Pages

Tuesday, November 25, 2014

What to Bring to Thanksgiving - Make Them the Day Before

I was only going to do one post this week, but then when I woke up this morning this post began swirling around in my head.

If you're wondering what to bring with to Thanksgiving or wondering what to make a day ahead of time if you're hosting, I have a few dish ideas for you.


mashed pot 063

Pioneer Woman's Mashed Potatoes are THE BEST.  The. Best.  I only put in 1 stick of butter and just a few pats on the top, but other than that I follow her recipe to the letter. Find her recipe and step by step instructions here.  You can make these a day ahead of time and just warm them up in the oven for a half hour the day of (mayhaps once the bird is out and gravy is being made & turkey being sliced).  On a day like Thanksgiving where prep time is precious this is a real bonus.  If you're hosting this is a great dish to hand off to someone else!


Cranberry Almond Cake

Budget Bytes Cranberry Almond Cake is a real winner!  It sounded interesting last year when she posted it so I tried it and I was blown away.  I brought it in addition to pumpkin pie and it was really popular.  I am going to bring it to both Thanksgivings (Corey & I double up on Thanksgiving) this year!  Find her recipe and step by step instructions here.  Make this a day ahead of time if you're hosting or bringing it with to your dinner.


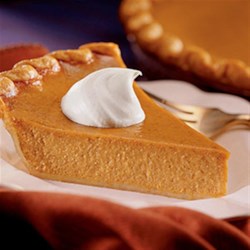
Libby's(R) Famous Pumpkin Pie Recipe

When it comes to pumpkin pie my mom and I always use the Libby's recipe off the can!  It is so so good!  Find the recipe here.  You can use pre-made pie crust if you're not comfortable making your own.  Make it the day before and pop it in the fridge until serving time.  And it is really fun and easy to make your own whipped cream to go with it.  Just buy some whipping cream, add a few tablespoons of sugar, and whip it up with your mixer.  Wait as long as you can to make it, but it'll stay nice & fluffy surprisingly long with nothing special added in.  It tastes soooo much better than the stuff in the can.  And as long as you have a mixer (hand or stand) it's easy!

Happy Thanksgiving, Everyone!


Monday, November 24, 2014

Easy DIY Coat Rack


This will be the only post this week (I hope you have a Happy Thanksgiving!) so I'm making it a doozy.  I mentioned in this post about creating the Entryway that I wanted to build a coat rack.  I first pinned my inspiration picture three months ago!  Since then I've been letting the idea stew and been meaning to do it and meaning to do it.  I started buying supplies about a month ago.  Then I realized that it'd be really nice to have the coat rack up when my family came over for Corey's birthday dinner.  Suddenly I had a deadline and things started ramping up.  I work best with deadlines and I quickly had all the supplies at the ready.
Six days before my family was coming over Corey & I started work (on a Sunday).  I was planning on making this really simple, but the wonder of my husband is his ability to take my ideas to the next level.  So now instead of having the shelf edges line up on the top and wall pieces (like my inspiration picture), the wall piece was going to be inset & smaller and I was going to route the edges of both pieces on the router table.

Supplies You'll Need:

  • one 1" x 8" x 8' board (or 6' board)
  • two pre-made wooden shelf supports
  • 6 screws
  • 6 hooks
  • stain or paint
  • bolts to mount it to the wall (toggle bolts if you have plaster walls, standard bolts if you have drywall)


First off we did a mock up with an extra board before any cuts were made:


I played around with hook arrangement and decided I liked the straight across version best:


The hooks look like little octopi to me:

Then the real first step was cutting the 8' long board into a 3' long board and a 32" long board once we measured it out.  Man I love using this saw:


Oooo it's going to look so good!


Now it was time to use the router table.  Turns out this is SHOCKINGLY EASY for how much it elevates a simple piece of wood.  Seriously, having the shelf edges routed makes the coat rack such a classy impressive piece.  And it added maybe 10 minutes to the project time.  Granted, if you don't have a router table and can't borrow one than it's not worth it for you.


We picked a fancy bit for the top piece, Corey put it on the router and I practiced on a scrap.  I realized the smoothest look comes from feeding the piece of wood through the router at an even pace.  Then I fed the real 3' piece through on three sides being sure to hold the piece steady against the little wall.  EASY PEASY.

Here is a picture of the test piece, but the machine is off and the wood is not in the right place.  The wood is fed past the little bit and you hold it against that little back wall piece.  I should have had Corey take a picture of me using the router table. Oops.

All routed!


We couldn't use the same bit on the wall piece because of how close the bottom of the shelf support was to the bottom of the wall piece.  But we didn't want it to look really plain in comparison to the top piece, so we just picked a simple router bit that wouldn't take much wood off.  Then I fed the 32" piece through on three sides (after a practice round with the new bit). So easy!


See how close the shelf support is to the bottom of the wall piece?

So I just did simple routing along the edge to give it a little bit of oomph:

The routed edge JUST meets the shelf support and looks perfect

Then I brought the pieces inside to sand (it was FREEZING in the garage).  I wanted to sand before staining and I knew they'd be easier to sand when they were apart.

Here goes nothing!  Time to attach the shelf supports to the back piece.  On the back of the piece I measured out where the supports were going on the front so we knew we were pre-dilling in the right place from the back.  I made some Xs to mark the holes and drilled:


An awkward clamp situation kept the shelf supports in place:


Use a countersink bit to make a hollow for the top of the screw to rest in so the screw is flush against the wall:


Screw in the screws!:


Do it again on the other side and voila:

Clamp the top piece in place, pre-drill two holes in the top of each shelf support, countersink them, and screw in the screws!


Since these screws are dark and I knew I was going to be staining this piece dark and hanging it high enough that 99% of people wouldn't see the top of the shelf I did not worry about the fact that the screws would show.

Drill two holes on the top to hold the two shelf pieces together, countersink, and then put in the screws:


YOU BUILT SOMETHING!  Feel proud of yourself!


Now you are ready to stain or paint.  At this point Corey & I stopped for the night.  But cutting the pieces, routing them, and screwing them together took maybe....two hours?  And we were being careful and slow and stopping to take pictures and checking in on the puppy (alone in the house and not kenneled = surprise inspections).

I chose to stain my coat rack because I wanted to attempt having it look original to the house.  Plus I knew the stain wouldn't show the wear and tear from use as much a coat of white paint would over the years.

Here is where I began to feel like a mad scientist.  My house has the original stained wood trim from 1921.  And the coat rack was going to be hung inches away from some of that trim so I wanted to get as close a stain color match as possible.  So I did my best and bought the stain that seemed the closest match to me based on the little picture on the can.


So I got all fancy and got my test piece ready to see how many minutes of leaving the stain would give the closest match.  I also decided to do my own test of the effectiveness of pre-stain wood conditioner while I was at it.


The 2x4 scrap barely even took the stain, but it was still clear that the stain was way too red.  I already had a can of very dark stain that I used on the front door and that my mom used on the bathroom window trim, so I decided to try to mix the two together and see how close I could come.  I started with a 50-50 mix in a mason jar (man those are handy) and that was the best match!


I did another test piece, this time with a higher quality scrap that I sanded:


It darkened up the red without totally covering it up.  And the left half has no wood conditioner and the right half does.  So dear god, yes it does make a difference!

So now I knew my ratio and got started:


I let it sit for 20 minutes and then I wiped it:

I was happy with one coat and thought a second would darken it too much.

Give your piece a couple of days to dry before you mount the hooks. I stained during the day on a Monday and we mounted it on a Wednesday night (I put the hooks on Wednesday afternoon).


I still think I am missing a bit of an orange hue and the sheen, so I may end up trying something else (maybe this finishing wax) on top of the stain.  But since we have plaster walls we used four toggle bolts to mount it to the wall and it's not coming off anytime soon.  So anything else I try has to be done while it's up on the wall.

I ended up figuring out the hook spacing by eye because every time I tried measuring or going off of a straightedge it became clear that each hook was subtly different and I got it to look better just by eyeing it.


Once you're happy with your spacing use a pencil and trace your screw holes.  Take one hook off at a time and pre-drill the holes.  


These screws were pretty deep so I had to be careful not to accidentally pre-drill all the way through the piece!  


Now you can start screwing on the hooks one by one. Don't take them all off or it's harder to get everything fully lined up like how it was.  I did it by hand because I didn't want to take a chance with the power drill and end marring the finish or anything.


Okay now it is mounting time!  I am no expert at this, but I know for our 1921 lathe and plaster walls we needed to use toggle bolts (also called molly bolts).  Stud finders aren't as useful with lathe and plaster (the wood lathe confuses most of them) so we just winged it and had regular bolts for if we ended up hitting a stud where we screwed.  We used four bolts because we wanted to make sure the coat rack was secure as 12 coats can be quite heavy and we figured we wouldn't hit a stud.

Because of the style of hooks I chose we could hide the mounting bolts behind the hook face plate!  Tricksy.

So after I spent way too long getting these hooks installed, Corey promptly unscrewed all of them.  But that's the way it had to be.  First he traced the outline of the hooks to help with the bolt placement and then he pre-drilled the holes for the four bolts, two on each end and countersunk the holes so the hook face plates would still lay flat::

Then we held up the coat rack on the wall, put a level on top of it, and used a pencil to mark where the holes needed to go on the wall.  

Then Corey pre-drilled the four holes in the wall:


Then it was showtime:


Why hello there, stain leakage

Those little wings are what makes it a toggle bolt and what keeps the piece secure in just plaster & lathe and not a stud.


Once it was up Corey put the four hooks back on and it was time for the decorate-y details.  Man this was fun for me!


I played around with things and ended up here:


We got this up and mounted on Wednesday and everyone came on Saturday.  It was fully loaded with coats and all was well, but I sadly forgot to get a picture of it.

Now we are going to use the scrap from this to create a simpler (no top shelf) version for the bathroom!

Friday, November 21, 2014

How to Make A Quilt - Part 3 - Binding and Embroidery


It is Quilting Week on Crafty Homestead!  Monday was Part 1 of How to Make A Quilt, Wednesday was Part 2, and today we finish up with Part 3.  This is the part where you are binding up the quilt so they appear to be one layer and when you sign your work.  

Part 1 - Make the Top
Part 2- Do the Quilting
Part 3- Binding and Embroidery

Step 31: Okay so we left off with your quilt being quilted, yay!  Now we need to bind this baby up.  We are in the home stretch.

Binding my first quilt was a nightmare because I used a premade binding that was way too skinny and required too much accuracy (you're sewing through the top and back and the same time and through five layers of fabric).  For all the quilts between this one and the first one I used satin blanket binding.  Satin blanket binding is a dream to work with because it is so wide (and therefore forgiving), but I noticed with my niece and nephews quilts that they don't hold up as well as fabric binding does.  For as nightmarish as my first binding experience was, it held up way better than the satin did.

But now we have this wonderful online crafting blogging world and awhile ago I found a tutorial for fabric binding that didn't look terrible (I found it through the amazing Elise of EnJOY It) and I wanted to try fabric binding again.  I didn't take pictures through this process because it's the first time I've done it and I thought I should just link to the very detailed tutorial that I used.


So now it's time to click over here and follow Amanda Jean's tutorial for binding.  You'll notice it's all machine binding and that's because my hand sewing does NOT hold up to any sort of wear and tear.

Here is my binding!  I decided to use the flowered fabric because I loved it and wanted more of it in the quilt.  Plus I loved the contrast with the dark purple backing.  This binding process was straightforward and did not induce any headaches.  I like that it's sturdier and you can just use regular fabric for it.  I will bind all my quilts with this technique from now on.

Once your quilt is bound you are technically done!  It can be safely washed and is ready to go.  But I think it's nice to sign your work.  Just put your initials and the year in the bottom corner or something.  If it's a gift I like to be more extravagant with my embroidery:


Just noticed I forgot the comma in the date ARGH
Embroidery is really easy.  My mom showed me how for my first quilt.  I didn't really know how to take pictures of the process.  You use embroidery floss and an embroidery needle.  I use all 6 strands of floss because I like the letters to be thick.  You only embroider through the backing piece (when you put the needle in you can feel that you're not going all the way through).  The way I go from letter to letter is to put the needle under the backing and push it through and pop it up where I am going to start the next letter.  

It's called back stitch embroidery and I found a tutorial that will hopefully help you: http://sublimestitching.com/pages/how-to-back-stitch

I figure out the middle letter of my first line and find the middle of the quilt and work out:


At this point I was finishing the embroidery the DAY I was giving it to my niece and it also was the first full day we had Basil.  He was limited to just the kitchen back then so I embroidered the last two lines on the kitchen floor that morning with a sleepy buddy:

Then I gave it to a sweet baby girl who turned one!


Now to be nostalgic, here are the four first birthday quilt pictures all together for the first time:


Maybe it's because I'm a fourth child, but I am a sucker for tradition and keeping things even.

If you make a quilt from this tutorial I'd love to hear from you!  Please comment!

Here's one last piece of encouragement to try quilting. It's a lot of steps and can look overwhelming when put all together like this, but just take it one step at a time. Really it's all just straight lines over and over. AND you don't have to do a design where the corners are supposed to meet. You can do a loosey goosey patchwork design with rectangles and squares like this one from Elise of EnJOY It:


Go quilt, friends!